7 Simple Steps to Save Your Front Load Washer – FIX Appliances CA Expert Guide
Technically Reviewed by Oleg Chudnovski, CEO on Apr 09, 2024 | Written by Fix Appliances CA Editorial Contributors
In this article…
- Step 1: Prevent Mold Growth
- Step 2: Things to Avoid
- Step 3: Protecting and Clean Your Door Seal Gasket (Boot)
- Step 4: Cleaning the Dispenser
- Step 5: Running Cleaning Cycle
- Step 6: Increasing the Lifespan of Washer’s Parts
- Step 7: What to Do If Problems Strike

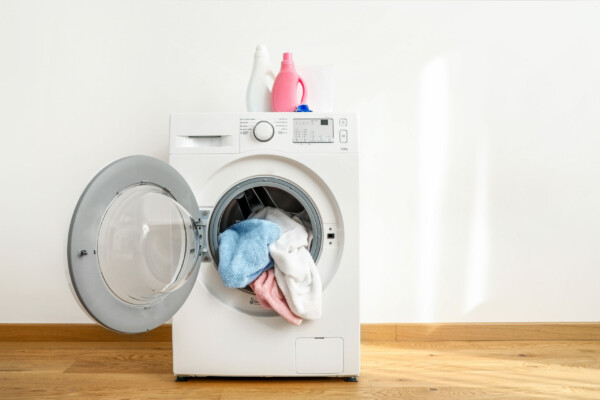
With your purchase of a front-load washing machine, you’ve joined the millions of other Canadians who have chosen a high-efficiency unit to perform one of the most labour-intensive tasks in their household. Even though you may have spent more on it than your traditional top-load machine, it probably appealed to you for many reasons—they are gentler on clothing, reduce drying time as they extract more water, and save money on water, electricity and laundry detergent.
Follow these 7 simple steps to keep your front-load washer running at peak efficiency, reduce washer repair calls and make your laundry experience more enjoyable:
- Prevent Mold Growth: Wipe down the door seal and inner drum regularly to remove moisture and detergent residue.
- Avoid Certain Practices: Don’t overload the washer or use excessive detergent.
- Protect and Clean Your Door Seal Gasket (Boot): Clean the door seal gasket with a mixture of water and vinegar.
- Clean the Dispenser: Take out and tidy the fabric softener and detergent dispensers.
- Run Cleaning Cycles Regularly: Use hot water and a washing machine cleaner for cleaning cycles.
- Extend the Lifespan of Washer Parts: Avoid slamming the door shut and overloading the washer.
- Troubleshoot Problems When They Occur: Refer to the manual or contact a professional for assistance with any issues.
Below, we will delve into each step in more detail.
Step 1: Prevent Mold Growth

You may have heard about or experienced mould growth in your front-loading washing machine. This highly efficient equipment uses less water than other styles, so powder detergent, fabric softener, and debris particles from dirty clothes are not completely washed away during the wash cycle. An accumulation of these substances often keeps parts of the machine damp and more susceptible to mould growth.
In addition, washing in cold instead of hot water reduces wear on clothing but does not kill mould spores. As mould grows on the seals and drum of your equipment, you’ll begin to notice musty odours that can transfer to your clothing. To prevent mould and mildew from forming:
- Don’t allow damp clothing to sit inside the machine. Remove them immediately after the wash cycle has been completed. Avoid washing before going to bed at night or before leaving for work in the morning, which would keep clothing in the machine for an extended period of time.
- Improve air circulation in the machine and allow it to dry out by leaving the door and detergent dispenser open when not in use. Keep children and pets safe by locking the laundry room door.
- Dry off the inside surfaces, door, and seal after each wash cycle.
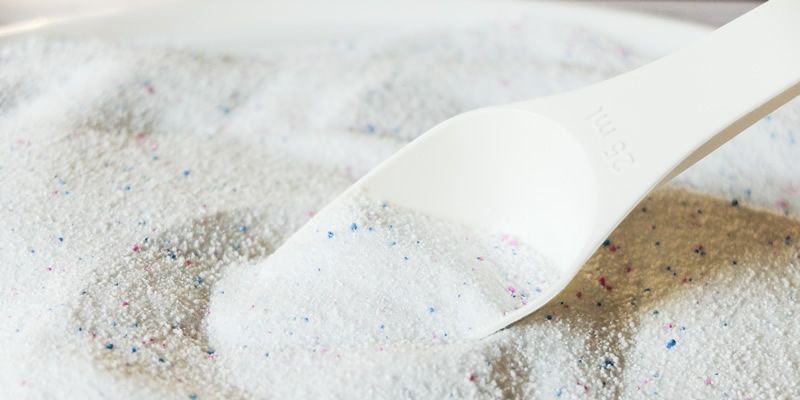
- Use liquid detergent instead of powder to reduce the build-up of residue. Also, use only the recommended amount of detergent to be sure it completely cycles through in the wash. More detergent will not make clothes cleaner.
- If your laundry room or basement laundry area is damp, running a dehumidifier will help remove moisture from the air and reduce mould from growing.
Step 2: Things to Avoid
The technology is very different from your traditional-style washing machine, so there are a few things that you must do differently or avoid altogether or risk damaging your equipment:
- Don’t use regular detergents as they produce too many suds. Over time, a thick film can build up on the hoses and the drum, which may cause mechanical or electronic damage to the machine. To avoid receiving an Error Code F21 on a Maytag Washer, always use specially made, high-efficiency (HE) detergents that produce low suds. Read labels carefully, as using the wrong detergent can sometimes void the warranty.
- Discontinue using fabric softener in the washer. Today’s detergents include a softener, so the extra liquid is unnecessary. Consider using dryer sheets instead that reduce static without leaving a residue. One teaspoon will handle the entire load using a liquid fabric softener. The same goes for bleach—use one tablespoon of concentrated or two tablespoons of regular bleach for a full load.
Step 3: Protecting and Clean Your Door Seal Gasket (Boot)
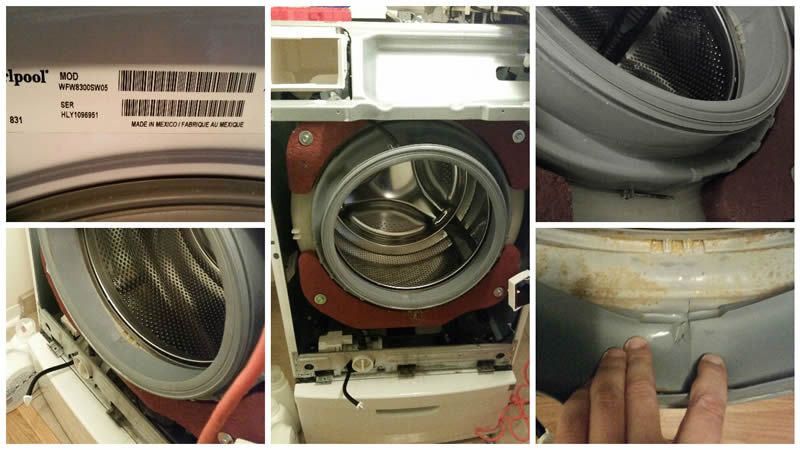
One of the top reasons homeowners require appliance repair is to protect the door seal gasket (boot) with regular cleanings. Residue and debris from laundry can build up on the door seal. Sticky detergents will make the door harder to open and close; the seal will become misshapen and leak or tear. It’s also more prone to be a breeding ground for mould and mildew. Protect your investment by:
- Cleaning the rubber seal at the front of the washing machine regularly. Wipe water and detergent residue off after each wash cycle.
- Combine a solution of half water and half vinegar to strip down and remove all fabric, pieces of hair and other debris. Use a cotton swab to reach into corners and hard-to-clean spots. Wipe out the inside of the drum also to eliminate odours.
- If you notice mould growing on the seal, remove the rubber lining and wipe it down (including all the creases in and around the lining) with bleach or mildew cleaners. Be sure to wear gloves and leave the door open for five minutes to allow fumes to circulate.
- Regularly inspect the door seal, ensuring it fits snuggly against the machine. If you notice cracks or tears or receive an error code, contact a repair service to replace it.
Step 4: Cleaning the Dispenser
It’s counterintuitive to think of the product that’s instrumental in cleaning your clothes, which can contribute to the mess. To ensure you’re receiving all the benefits detergents can provide and none of the drawbacks, it’s important to address issues with the cleaning dispenser and filter system.
- To dry out the detergent dispenser drawer and reduce mould and mildew formation, you should leave the drawer out when you’re not using the machine.
- The detergent will eventually build up residue in the drawer that may promote mould and mildew. To ensure this doesn’t transfer to clothing, you’ll want to clean your dispenser drawer thoroughly. About once a month (or more often if you do a lot of laundry), remove the drawer and carefully separate the compartments. Soak the parts for approximately 15-20 minutes in a sink full of water and 1/3 cup of white vinegar. Meanwhile, wipe down the inside compartment with a paper towel dipped in bleach. This will kill any mould spores lingering there. Now that the grime on the soaking compartments has loosened, go back and scrub them clean. Allow it to dry and place it back inside the washer. The drawer is not dishwasher safe, so using this method will melt or warp the plastic.
Step 5: Running Cleaning Cycle
As you might imagine, everything that builds up in the dispenser and filter can also cause a problem in your machine’s washtub. Most units have a special cycle designed specifically to clean the washtub. Running this once a month will remove all the unwanted detergent build-up and residue to keep your wash drum performing in top condition.
- Empty the wash drum, and add liquid chlorine bleach, powder cleaner, or tub cleaner to the detergent dispenser. No detergent should be used at this time. Close the drawer and the door.
- Select “Tub Clean” or the appropriate cycle setting and “Start.”
- At the end of the cycle, allow the washer to cool down before opening the door. Then, wipe around the washer door opening, seal and glass with a towel to remove moisture.
- Leave the door open to allow for ventilation and dry the washers inside.
- If your machine doesn’t have a “Tub Clean” feature, follow the directions above, but run the machine on the hottest cycle, plus an extra rinse.
Step 6: Increasing the Lifespan of Washer’s Parts
Whether your machine displays an Error Code or you notice problems with water drainage, excessive vibrations, longer than usual cycle times, wet clothes after the final spin, or strange pauses in the wash cycle, you may have a clogged drain pump filter. You can easily avoid or rectify this problem by cleaning the filter regularly.
Always select the appropriate spin speed for your washing load to save on part wear and tear. Higher speeds will mean drier clothes but may potentially shorten the machine’s lifespan.
- The drain pump filter located behind a small door at the bottom/front of your front-loading washing machine should be cleaned every few weeks. The role of the filter is to trap hair, lint, bits of fabric and other debris. To ensure your machine drains dirty water quickly, you’ll need to remove the filter and clean off these particles. You may want to use gloves and rinse the filter in clear water before putting it back into the machine.
Step 7: What to Do If Problems Strike
If you’ve followed all the instructions and cared for your machine with regular cleaning and yet you still receive Maytag Washer Error Codes, you may be able to troubleshoot the problem yourself before calling in a repair technician. Check out our Easy DIY Diagnostics page to match your situation with the proper course of action. Write down any error codes or symptoms so that even if you cannot repair the problem yourself, the service tech can pinpoint the problem more quickly.
Do’s of Owning a High-Efficiency Front-Load Washer
- Do plan for wash cycles to be longer than traditional top-load cycles. Using less water saves money but requires extra time to clean the clothes. It also reduces dryer time as high spin speeds leave less water on clothing.
- Do occasionally incorporate a Hot water wash to eliminate some leftover soap and residue.
- Make sure you’ve removed all clothing after each load. Small items can easily become trapped in the basket, leading to mould and bacteria growth.
- Do consider diluting liquid fabric softener with water (1:6) or eliminating it entirely. Commercial products are sticky and adhere to the door seal, detergent dispenser and interior drum. A pre-mixed, diluted bottle of fabric softener will help regulate use and reduce problems.
- Do alternate between small and large items to be sure the load is balanced.
Don’ts of Owning a High-Efficiency Front-Load Washer
- Don’t use abrasive cleaners or sponges/cloths to wipe the interior or exterior of your washer. Doing so will scratch and damage your appliance.
- Don’t wash single items; the machine will sense an out-of-balance load and stop. Even if it does complete the cycle, the clothing will still be wet as the spin cycle will be ineffective.
- Don’t try to stop the wash cycle once you’ve started it. You won’t be able to add clothes mid-cycle like a top-load machine.
- Don’t leave loose change, keys or other items in your pockets during the wash cycle. This will lead to breakdowns and damage. Always check pockets before starting the wash.
- Don’t leave zippers open, as it may result in snagging other clothing or damage to the door and interior drum.
- Don’t wash heavy towels or bed sheets alone, which can cause an out-of-balance load. Always include smaller items in the load, also.
Keep your front-load washer in top shape with easy steps! From avoiding mould to using the right detergents, these tips make laundry hassle-free and save you from unnecessary repairs. Simple maintenance for a smoother laundry experience!
Oleg Chudnovski, SEO
Is Your Washing Machine Still Experiencing Issues? Let Us Fix It For You Today!
Caring for your front-load washer may take a little extra time, but by following these simple steps, your investment will continue running trouble-free for years to come. If you have questions about washer maintenance or require a service visit, contact FIX Appliances CA online or call 888-242-0777 today. We offer our appliance repair services in Barrie, Simcoe County, Toronto and all of the GTA, with same-day washer repair also available.

Oleg Chudnovski is the owner of Fix Appliances CA. His company serves as an authorized repair centre for leading manufacturers in Toronto and the Greater Toronto Area (GTA), including Panasonic, Fisher and Paykel, LG, Samsung, Dacor and others. Oleg leverages his daily experience to assist technicians and clients in addressing repairs of any complexity.
Date of page creation: August 14, 2023
Page update date: April 09, 2024
Ask a Question
PROFESSIONAL APPLIANCE SERVICE
Factory Certified
TSSA Gas Contractor
Complete Warranty

Authorized Repair