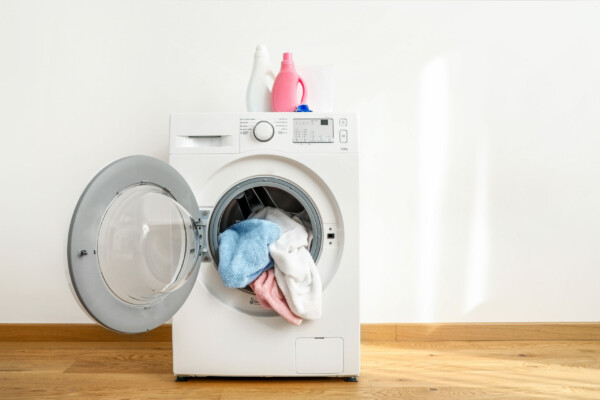
Do You Require a New Washer Door Boot Gasket Seal?
Technically Reviewed by Oleg Chudnovski, CEO on Oct 05, 2023 | Written by Fix Appliances CA Editorial Contributors
In this article…
- How to replace the door boot seal on a Whirlpool washing machine in just 5 steps!
- Washing machine leaking from door
- How to clean your washing machine rubber door seal.
One of the essential parts of any front-load washer is a rubber gasket. Let’s describe some important points in brief. A gasket seal is a watertight rubber serving to prevent water from flowing out of the washer during the cycle. The door exerts a compressive force on the rubber gasket, causing the gasket to deform elastically for a sealing effect.
When you have a leaky washing machine door seal, it can be a disaster. Water leaking may cause your clothes to get wet or water spills on the floor and needs to be cleaned up. Moreover, the other thing is the potential for mould and mildew to grow in places where water pools.
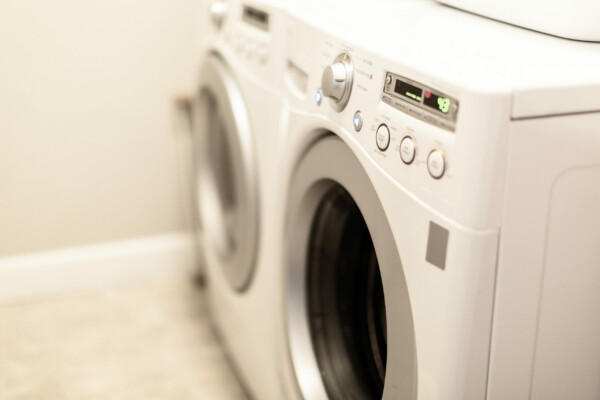
Washing Machine Leaking From the Door
A door gasket is the most common reason for water leakage in any washing machine. They often acquire holes or tears, letting water leak down inside the washer machine, which leaks out from underneath. Still, they can also leak from the door itself straight down the front of the washer machine, or you may face such things as the washing machine leaking from the bottom that requires the aid of the experts.
If you’ve experienced any of the following and need to replace your door boot, be sure to contact us directly with the model number of your washer. Our washing machine experts can easily find the correct door boot for your washer model.
Clean Your Washing Machine’s Rubber Door Seal
How often you should clean your washing machine door seal depends on how extensively you use your washing machine. Let’s point out the main signs when it is necessary to clean a door seal:
- You feel unpleasant smells inside your washing machine
- There are visible dark marks on a rubber door seal
However, once you are having trouble cleaning your machine door seal, mould may have seeped into the rubber, and in this case, you should replace the seal.
There is an easy way to clean your washing machine door seals and make your seals shine like new ones at once.
- First, mix 1 cup of bleach and 1 cup of baking soda (homemade cleaning solution) and pour into the detergent drawer. Then, add another cup of baking soda to the sealing area of the washing machine drum.
- Next, run several wash cycles in a washing machine with the drum completely empty, using this cleaning solution as the detergent at about 90 degrees temperature.
- After washing, mix a few drops of laundry detergent in warm water and wipe the seals thoroughly with a clean cloth with the soapy solution, cleaning around and under the seals as well.
How to replace the door boot seal on a Whirlpool washing machine in just 5 steps!
The rubber door seals on front-loaded washing machines will eventually become mouldy, torn, or fall apart. You can replace them on your own by purchasing new seals made for your specific washer model.
When you face the problem with a leaking washing machine door seal, replacing it is the right decision and can be an easy job for most homeowners. Our techs at Fix Appliances CA are ready to help with it, or follow the steps in the brief guide on replacing a washing machine door seal provided below.
Before proceeding, ensure the appliance is disconnected from a power source. Unplug it and/or turn the breaker off before doing any repairs. This is the most crucial step. We want to mention that the following steps for replacing the door boot apply to a wide range of front-load washing machines, including the most popular brands such as Maytag, LG, Samsung, Whirlpool, Bosch and other appliance manufacturers.
Now that we’ve mentioned that let’s get started!
- STEP 1
First, we will remove the top panel from the washer. Once removed, unfasten and remove the screws from the front panel. - STEP 2
Disconnect and remove the user interface panel from the front. Be very careful when removing this panel. Watch for electric commutation. Unfasten and remove the screws and bottom cover from the front of the main panel.
After removing these, remove the first retaining clamp that attaches the seal to the front panel. Now undo the screws holding the door latch and set it aside gently.
Now you should be able to remove the front panel. - STEP 3
We don’t need to replace any other parts except for the seal. Please be careful during the next steps.
Disconnect the old seal from the water supply. Remove the second retaining clamp attaching the seal to the outer tub.
Now you can remove the old seal.
Look at how dirty and beat-up this part is! It needed to be replaced! - STEP 4
Now it is time to install the new seal!
Let’s skip unpacking and get to work!
Attach the new seal thoroughly to the washer’s tub, secure it by retaining the clamp, and ensure the water supply is on the top near the water connector. It should be facing and located this way.
Double-check that the seal is firmly seated and in the correct position. - STEP 5
Almost done!
Put the front panel back and fix it by fastening the screws.
Place the latch back in.
Secure the seal in place with the retainer clamp.
Connect and install the user interface panel back into place and the top and bottom panels.
Ensure that all the screws are in the right places and well-tightened once the panels are assembled.
Great job, we did it!

Tip From Our Washing Machine Experts
One of the most common reasons for breaking seals is an accumulation of dirt within the gap between the door and frame. To prevent this from happening in the future, consider using a vacuum cleaner to collect old tissue and debris from the door seal between uses.
If you are having trouble repairing a door seal, do not hesitate to contact a specialist at our company. If the problem persists, the door seal is not the problem, and you require professional diagnostics and repair.
Is Your Washing Machine Still Having Problems?
If you have tried basic troubleshooting, such as checking the power supply or cleaning the filter, and your washer still has problems, in that case, you need to dig deeper to identify the underlying problem. Contact us today to have us fix it for you right away!
| ✓ Availability | Same-Day, 7 days a week |
| ✓ Service Areas | All over Toronto, Ontario, and the GTA |
| ✓ Experience | 17+ Years |
| ✓ Authorized Repair | Major Brands |
| ✓ Residential and Commercial Repair | Best Prices |
| ✓ Warranty | Up to 1-year |
Following these guidelines will ensure that your front-load washing machine will be in good working condition for many years. If you need to maintain your washing machine or any repair, don’t hesitate to contact FIX Appliances CA toll-free at 888-242-0777 or our parts department at 800-379-9451. Our appliance repair services are available throughout Barrie, Simcoe County, Toronto, and the GTA, with same-day washer repair as an option.
We hope that this post and video were helpful. Do you have any questions regarding your washing machine? Call us for any washer bellow tub seal replacement: at 647-503-6655, or book an appointment online.
If you’re interested in this and other helpful videos, hit the like button and subscribe! We’ll see you soon! Fix Appliances CA is here for you, even during such times.
Date of page creation: August 07, 2023
Page update date: October 05, 2023
Ask a Question
When should I replace a gasket on a washing machine?
Why is my Wirlpool washing machine leaking water?
Can Fix Appliances CA replace the rubber gasket on a Whirlpool washing machine?
PROFESSIONAL APPLIANCE SERVICE
Factory Certified
TSSA Gas Contractor
Complete Warranty

Authorized Repair